The "Non" Diaper Bag, my Sewphisticated Pocket Purse and a Twisted Pouch
I finished a few more bags in the past few weeks.
The first was an attempt to make a "non-diaper bag" for SIL Tara -- the idea was to make a bag, small enough for a quick run to the store that could function as a purse but still carry all the essentials for a single diaper change, just in case.
When we were planning this project a few months ago, I had just finished making Abbey's tote bag, so that pattern packet (McCall's 4118) was still on my work table. Also, Tara had admired the stipple quilting on the blue corduroy on my Lazy Girl Chelsea backpack. We wanted the colors to coordinate with Ryan's stroller "ensemble" and didn't want it to look too "quilty". We decided that view B from the pattern was a good size and design, so then I was off to JoAnn ETC to look for just the right fabric. I found a nifty velvety corduroy (washable, of course) and selected a striped stretch twill for the lining and contrast bands. The binding for the inside seams and pockets was made from a remnant in my stash -- a twill fabric in the perfect shade of blue!
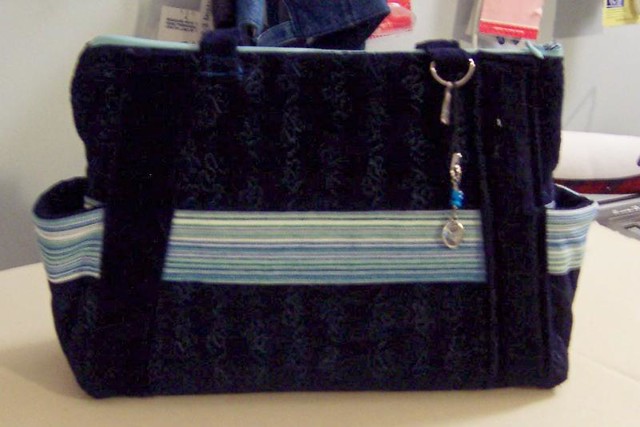
I used the stipple stitch on my sewing machine and #30 wt Sulky Blendable cotton thread to "quilt" the outside of the bag. I only quilted the front, back and pockets, not the handles. (The stippling stitches show up better in the pix in my photo gallery.) I used an invisible zipper closure (but didn't stitch it invisibly) because I liked the zipper pull better than a standard zipper. I'm still using "garment" zippers in most of my bags because I like the variety of colors, I hadn't found a local source of purse zippers, and because I have quite a few in my stash. At the Jersey Gems quilt show, I picked up a business card for a shop in Closter, NJ that had all kinds of purse zippers (with cool charms on the pulls) and a variety of colors. One of these days I'm going to go browse their website and see what I can get my hands on.
I modified the design by adding a D-ring to one of the handles and a hook. I wanted to have a place to attach keys to the purse so they wouldn't get lost. The final embellishment was a fob I made with a glass bead and silver charm that has the words "Laugh often, Love much".
Click below to see:
- inside of the bag
- alternate view of the outside
What I liked about this project: I really like the way the colors all came together in the end. During the "design" phase, I wasn't sure how the patterns and colors would mesh together -- would it be too busy, or too plain? But I really like the way the colors of the Sulky thread pick up the striped twill, and the zipper and blue binding really "popped".
What I didn't like about this project: The pattern instructions call for encasing the side and bottom seams in binding. While this looks nice, it makes those seams very bulky, so that when sewing the bottom to the sides, it's nearly impossible to get a needle thru all those layers of fabric, binding and batting. I trimmed everything I could from those bottom side seams, but they were still a nightmare to stitch closed, even with a heavy duty denim needle. I really like the way the Lazy Girl patterns handle bottom seams, so I will probably try to make their versions of these bags in the future.
Tara said last week that she really likes the bag and that she uses it all the time. That's the best compliment.
.................................................................................
I also finished another pocket purse - my Sewphisticated Pocket Purse:
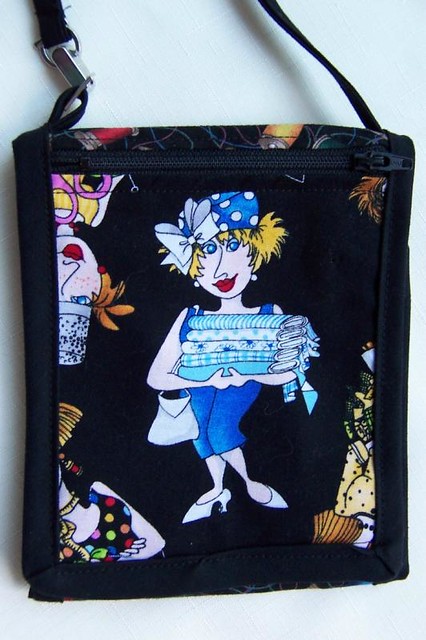
Finished it just in time for the Jersey Gems quilt show. This was made from the same pattern I used to make my Amazin Mets Pocket Purse in April. For the front of the bag, I "fussy cut" a swatch of fabric from the Loralie licensed Sewphisticates fabric in my stash to showcase the fabric collecting lady in blue -- "just one quarter yard each" is her designation. For the rest of the bag I used a novelty fat quarter I purchased at JoAnn Fabrics -- tumbling spools of thread on a black background. Another remnant of twill in black was used to make the binding and shoulder strap.
On my Mets pocket purse, I had a lot of trouble with the binding around the edges. For this Sewphisticated purse, I replaced the piping with plain binding on the inside pockets which helped reduce some of the bulkiness. I also decided to attach the binding using the more traditional method, rather than with the Adjustable Bias Binding Foot attachment. I had more luck with this purse . . . two of the corners look very nicely mitered, the other two need some help. Unfortunately, the two sloppy looking corners are on the front of the bag! So I still have a little fixing to do.
Also, I decided to add a small buckle to the shoulder strap so that it could be detached on one end. I did this because when I use my Mets purse, sometimes I put a sweater on over the bag and then it is difficult to get to the bag . . . this way, I can unbuckle it and retrieve it easily. Or I can loop it through the belt loops of my jeans and let it hang from there instead of adding weight to my shoulders. It gives me options, and I like that.
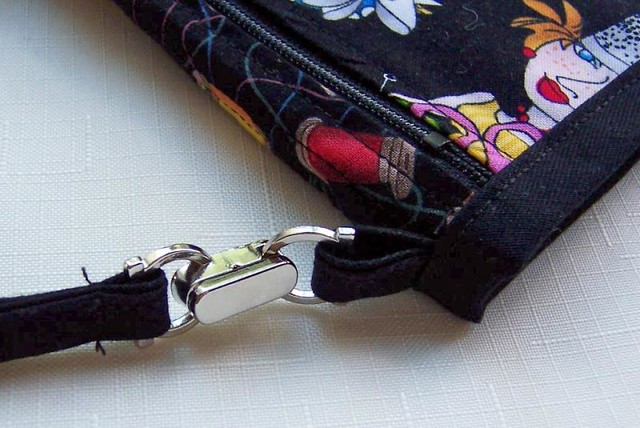
(Looks like I need to trim a few threads . . .)
I bought a whole bunch of these little buckles in the red-stickered clearance at JoAnn's a few months ago, for less than $0.50 each. I love a bargain.
.................................................................................
One more bag:
Not really a bag, but just an accessory for Abbey's tote. I wanted to make one more small accessory for her, so I made this twisted pouch:
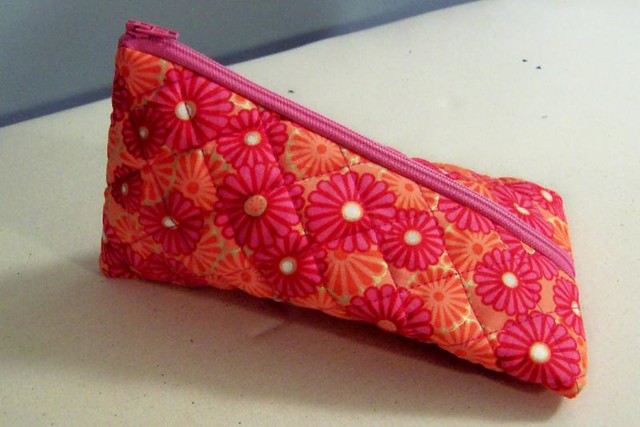
I machine quilted a square about 9-10" in size and attached a 7" zipper to two parallel edges, forming a tube. Then I stitched the side ends closed. On one end, the zipper was centered with the first seam, on the other, it forms the edge of the seam (remember to leave the zipper open while stitching the ends so the pouch can be turned right side out). This is not an original idea . . . I took a class last summer where this was the "hands on" project. The whole thing took me about 90 minutes to complete.


Comments
Post a Comment